Here is the problem with most Christmas garland: it goes up as an afterthought. A thin, flat strand draped across the mantel, lights tangled on the outside, one end sliding off by December 10. Christmas garland ideas fix exactly that, because garland is the frame for everything else — the stockings hang from it, the mantel display sits against it, and it is the first thing guests see when they walk in.
This guide covers 16 garland looks across the three places that matter most — mantels, staircases, and doorways — plus four bonus spots people forget. You will get the fresh-versus-faux call for each spot, how many lights per foot actually look good, real costs, and a hanging method that does not damage your woodwork. If you already have stockings picked out, start with the mantel section, because the garland and the stockings have to be planned together — our Christmas stocking ideas guide covers spacing and holders in detail.
Fresh vs. Faux: The First Decision
Fresh garland smells like Christmas and photographs beautifully, but it has a clock on it: 2 to 3 weeks indoors before it dries, sheds, and turns brittle, less if it hangs near a fireplace or a heating vent. Faux garland has no scent and costs more up front, but a good one lasts a decade and looks the same on December 24 as it did on November 28. The rule that works: fresh where you see and smell it up close (mantel, front door), faux where you cannot easily reach it (high staircases, tall doorways, chandeliers).
On cost, a 9-foot fresh cedar garland runs $25 to $45 at a garden center or tree lot, and you buy it again every year. A decent 9-foot faux garland runs $40 to $90, and a thick, realistic one with mixed tips runs $90 to $150 — but you buy it once. If you decorate three spots, the math flips fast: three fresh garlands a year for five years costs more than three good faux ones bought once, unless the scent matters to you enough to pay for it. It does for a lot of people, and that is a fine reason — just budget it as an annual cost, not a one-time buy.
Mixing is allowed and often looks best. A faux base garland with fresh cedar sprigs tucked in gives you fullness plus scent, and you only replace the sprigs, not the whole strand. Whichever you choose, buy 25 to 30 percent more length than the span you are covering: a 6-foot mantel needs a 9-foot garland once you add swags and side drops, and a staircase needs roughly 1.5 times the banister length to swag properly.
Mantel Garlands: 5 Ideas
1. The classic cedar swag. One thick cedar garland, draped in a shallow swag that dips 8 to 10 inches between three anchor points, with warm white lights woven through before hanging. This is the baseline every other mantel idea builds on, and it is the one to choose if you only do one thing. Cost: $30 to $60 fresh, $50 to $90 faux, plus one 100-light strand ($8 to $15).
2. Mixed evergreen, layered thick. Layer two garlands — a fir base and a cedar or pine top — and fluff them together until no wire shows. The mixed textures read expensive because real mantels in old houses were dressed with whatever branches were cut, not one uniform strand. Two 9-foot strands run $60 to $120 fresh or $100 to $180 faux, and this is the single best upgrade if your current garland looks thin.
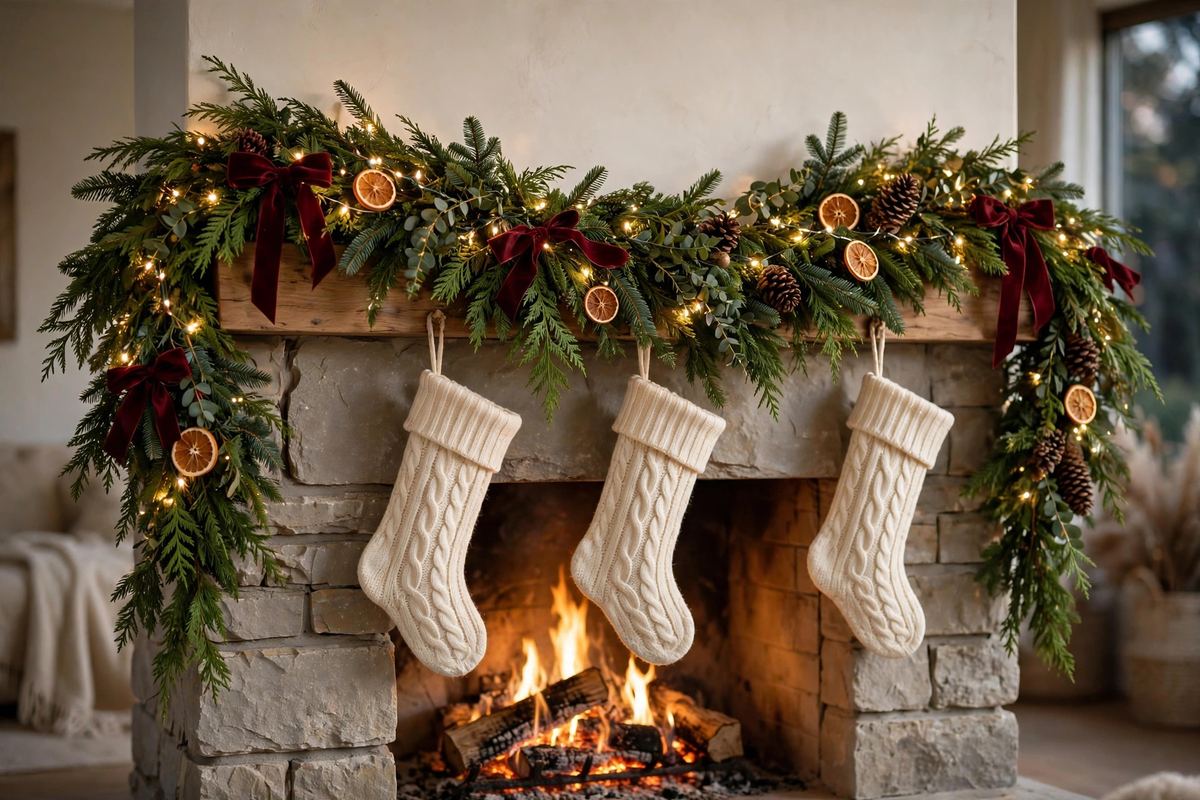
3. Velvet bow mantel garland. Take the classic cedar swag and tie three oversized burgundy velvet bows into it — one at each end and one at the center dip. The bows do the decorating so the garland itself can stay simple. This pairs directly with the ribbon styling in our velvet bow Christmas decor guide, and three ready-made velvet bows cost $15 to $30 total.
4. Dried orange and cinnamon mantel garland. Tuck dried orange slices, cinnamon bundles tied with twine, and pinecones into a cedar garland, and skip the ribbon entirely. The oranges catch the light from the fairy lights and glow amber in the evening. Drying a dozen oranges costs about $3 and an afternoon in a low oven — full steps are at the end of this guide.
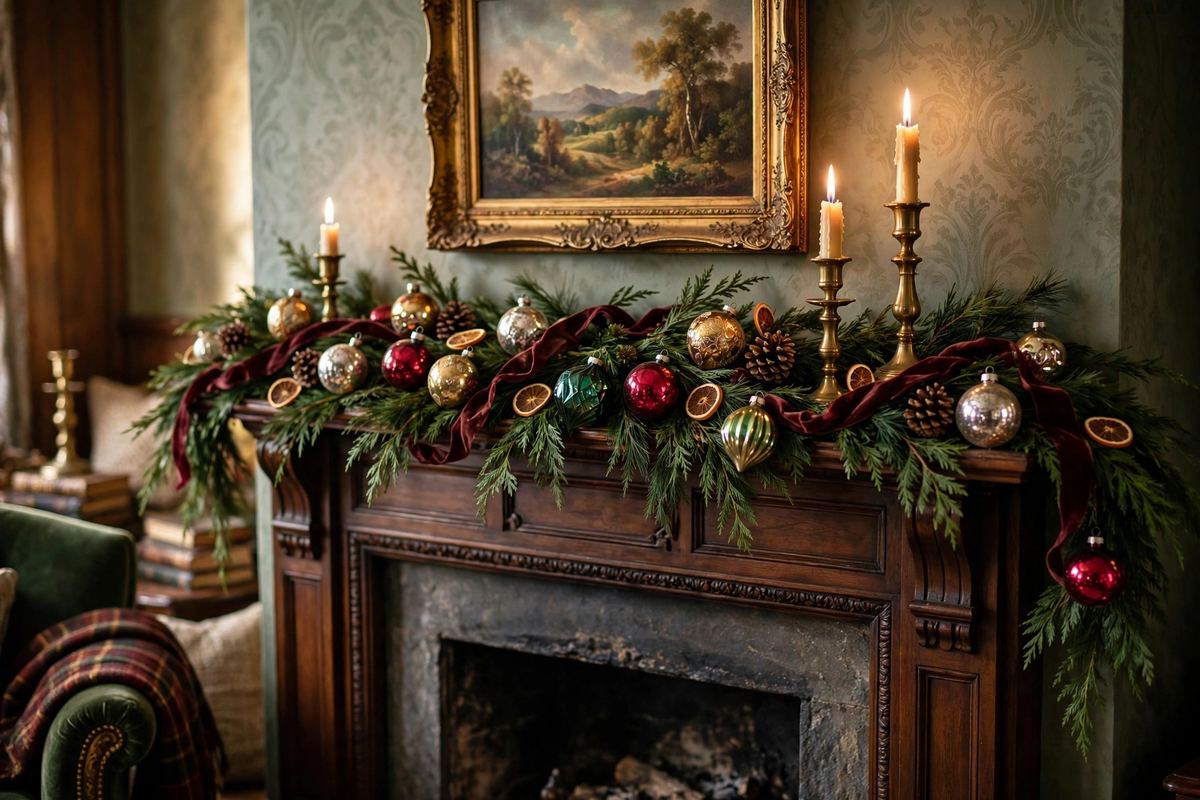
5. The asymmetric cascade. Anchor the garland high on one side of the mantel and let it cascade down the other side to the hearth, instead of draping it evenly. This suits a modern or minimal mantel, and it leaves one side of the mantel shelf clear for candlesticks or a framed print. Use a heavier anchor on the high side — a cascade pulls sideways, and a weak hook will creep. For the full layered mantel picture, our Victorian Christmas mantel ideas guide covers garland plus candlesticks and vintage ornaments in the same warm style.
Staircase Garlands: 4 Ideas
6. The banister swag with plaid bows. Drape the garland along the banister in generous swags, one per two or three spindles, and tie a plaid bow at each low point. This is the classic staircase look for a reason: the swags give the stairs rhythm, and the bows mark the beat. A straight staircase needs one 9-foot garland per 6 feet of banister once swags are factored in, so measure the banister run, not the stair count.
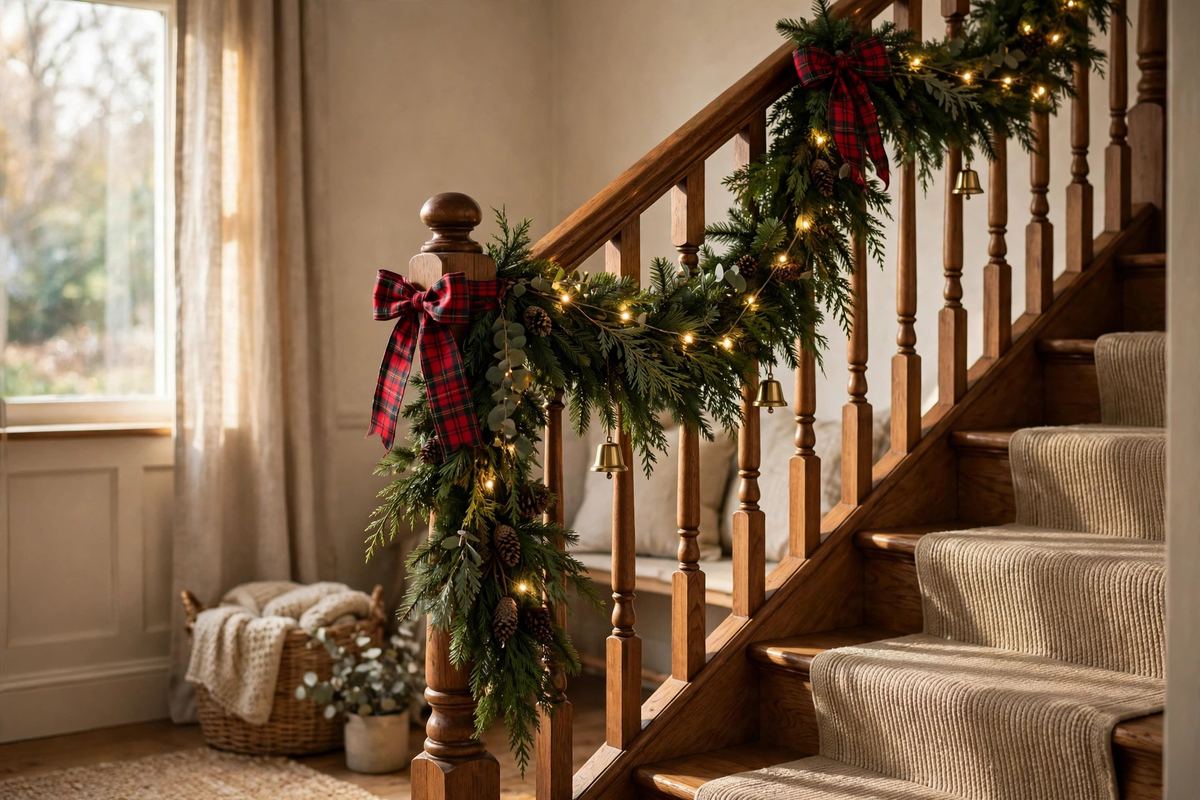
7. Full banister wrap with bells. Instead of swagging, wrap the garland tightly around the handrail itself and hang small brass bells from it every few feet. The bells catch the light and give a soft sound when the rail is touched — a small detail kids notice immediately. This works best on a sturdy wooden rail; on a thin metal rail, swagging looks better than wrapping.
8. Staircase garland with newel stockings. If the mantel is full, the staircase is the overflow spot for stockings: hang one stocking from each newel post, with the garland swagged between them. This is the same overflow trick from our Christmas stocking ideas guide, and it turns the staircase into a second display instead of a storage spot for extras.
9. Minimal eucalyptus stair garland. For a calm, modern staircase, skip the thick evergreen and use a slim eucalyptus garland with a single strand of warm lights and no bows. Eucalyptus reads light and airy where fir reads heavy, and a faux eucalyptus garland costs $20 to $35 for 6 feet. Keep it on the banister only — eucalyptus is too thin to swag well, so anchor it straight along the rail.
Doorway & Entry Garlands: 3 Ideas
10. The door arch. Frame the front door with one long garland run up one side, across the top, and down the other — a full arch, not just a top swag. A standard 36-inch door with 8-foot ceilings needs about 16 to 18 feet of garland for a full arch with side drops. Anchor it at the top corners and the midpoint of each side so wind cannot pull it loose. The arch is the single highest-impact outdoor decoration you can do, because every visitor walks through it.
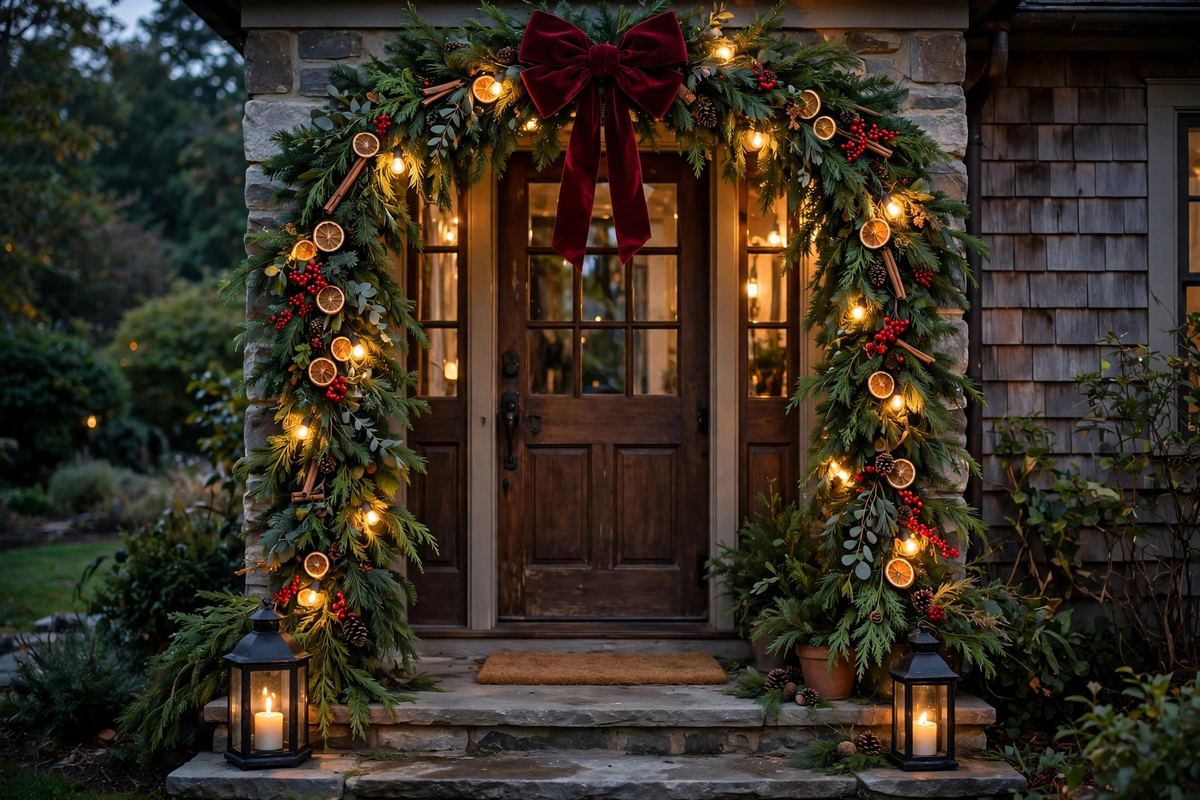
11. Double-door frame with a big top bow. On a double door or a door with sidelights, run the garland across the full width and tie one oversized velvet bow at the top center — the bow becomes the focal point from the street. Keep the side drops shorter than on a single door, or the garland will brush everyone who enters. Battery-operated lights ($10 to $18) are the practical choice here if no outdoor outlet is near the door.
12. Porch doorway with lanterns. Pair the door arch with two lanterns on the steps and a simple wreath on the door itself, and let the garland be the frame that ties them together. The trick is restraint: garland plus wreath plus lanterns is enough, and adding a third element like a porch sign tips it into clutter. Outdoor garland lasts longer than indoor fresh garland because the cold slows drying, so the front door is the best place to spend on fresh.
Beyond the Usual: 4 More Places for Garland
13. The table runner garland. Lay a slim garland down the center of the dining table as a living runner, with taper candles in holders rising out of it. Use a faux garland here — fresh garland sheds needles into the food — and keep it narrow, no wider than 8 inches, so plates still fit. This is the natural partner to our Christmas tablescape ideas guide, which covers the full table in the same warm palette.
14. Window frame garland. Frame one large window, usually the front-facing living room window, with a slim garland and lights. From the street at night, a lit window frame reads like a picture frame, and it costs one 6-foot garland and one light strand. Keep the garland inside the glass, not outside, unless it is rated for weather.
15. Mirror and chandelier garland. A small garland swagged across the top of a large mirror doubles the lights in the reflection and makes a hallway feel twice as decorated. On a chandelier, a slim garland looped once around the ring with battery lights is enough — never hang a heavy garland from a light fixture, and keep all greenery at least 6 inches from any bulb that gets hot.
16. Faux pre-lit garland for hard-to-reach spots. For the top of a tall bookcase, a high beam, or a second-story doorway, a pre-lit faux garland is the only sensible choice: no ladder trips to replace drying branches, no watering, and the lights are already woven in. Pre-lit 9-foot garlands run $60 to $120, and they are the one garland worth buying in the January sales for next year.
How to Hang Garland So It Stays Put
Work in this order, and the garland will stay up all season. First, weave the lights through the garland while it is still on the table — one strand per 9 feet for a soft glow, two for a rich one. Second, fluff the garland: pull every branch tip outward until no wire shows, which takes about 10 minutes per 9 feet and is the difference between a $30 garland and a $100 look. Third, mark your anchor points before lifting anything: three for a mantel (left, center, right), every third spindle for a staircase, top corners plus side midpoints for a door arch.
Fourth, hang the garland, then decorate it — bows, oranges, pinecones, and bells all go on last, because they slide off while you are wrestling the strand into place. Fifth, step back and check the swag depths from across the room, not from two feet away: swags that look even up close often dip unevenly from the doorway, and a quick adjustment now saves a month of noticing it. Finally, hide the light cord: run it down the least visible end of the garland, behind a stocking or a lantern, and use a cord cover if it crosses a walkway.
DIY: Dried Oranges for Your Garland
Dried oranges are the cheapest garland upgrade there is, and they take one afternoon. Slice 3 to 4 navel oranges into slices about 1/4 inch thick — thinner slices curl, thicker slices take too long to dry. Lay them in a single layer on a rack over a baking sheet, and bake at 200 degrees Fahrenheit for 2 to 3 hours, flipping once halfway, until they feel dry and leathery, not sticky. Let them cool completely, then thread them onto the garland with short pieces of floral wire pushed through the flesh near the edge, or tie them on with twine through a small hole.
One batch of 4 oranges yields about 24 slices, enough for one 9-foot mantel garland if you space them 4 to 5 inches apart among the branches. Mix them with pinecones (free if you gather them, $5 to $8 a bag if you buy them) and cinnamon bundles (three sticks tied with twine, about $0.50 each). The oranges keep for the whole season indoors and can be reused for two or three years if you store them dry in a sealed bag. If you like making things for the season, our DIY advent calendar ideas for the home guide and our DIY Christmas gifts under $25 guide use the same low-cost, one-afternoon approach.
Mistakes to Avoid
- Buying exactly the span length. A 6-foot mantel needs a 9-foot garland once swags and side drops are added. Buy 25 to 30 percent more than the span, every time.
- Hanging fresh garland too early. Fresh garland hung in early November is dry by Christmas. Hang it the last weekend of November or later, and keep it away from fireplaces and heating vents.
- Weaving lights after hanging. Lights woven on the table disappear into the branches; lights added after hanging sit on the surface and show wire. Always light first, hang second.
- One anchor point in the middle. A single center hook lets both ends slide off within days. Use at least three anchors on a mantel and every third spindle on a staircase.
- Fresh garland on the dining table. It sheds needles into the food. Table garlands should always be faux, and kept narrow so plates still fit.
- Greenery touching hot bulbs or candles. Keep garland at least 6 inches from hot bulbs and 12 inches from any candle flame. Dried garland is more flammable than fresh — never use it near a flame.
If that garland is heading for the dining table, our DIY Christmas centerpiece ideas turn it into 12 finished centerpieces, from a ten-minute pinecone bowl to a full candlelit runner.